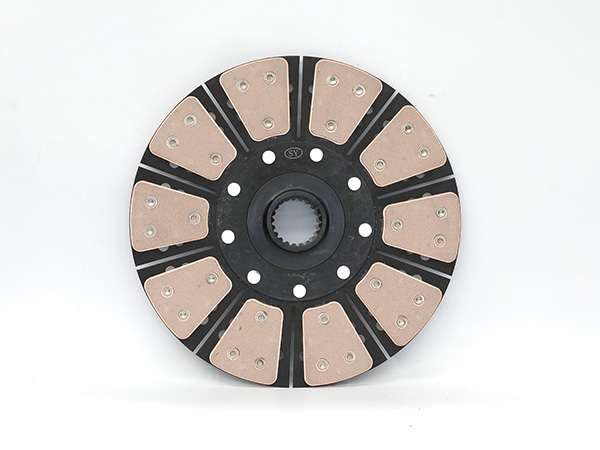
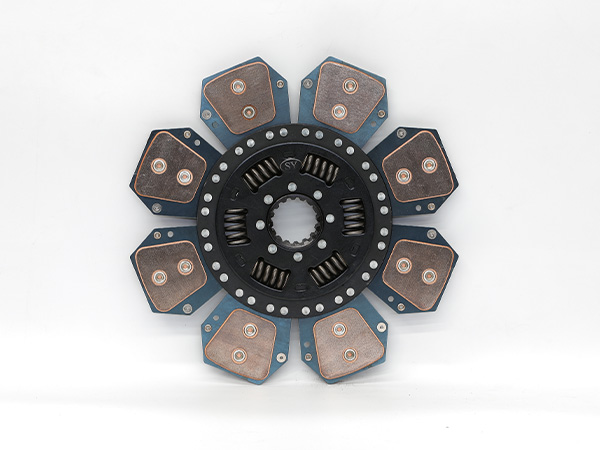
The clutch is an essential and important part on the tractor. The clutch gradually engages the engine with the driveline, ensuring a smooth start of the tractor. When the transmission needs to change gears according to the driving of the tractor, the clutch can temporarily cut off the power transmission of the engine to ensure the smooth shifting of the transmission. The clutch also has overload protection, preventing damage from overloading the driveline and PTO by slipping the friction linings.
However, during the use of the clutch, due to natural wear and improper use and operation, the wear of the clutch transmission mechanism and the wear of the friction plate cause the clutch to slip during the operation of the tractor, and the clutch is not completely separated, which affects the normal use of the tractor. Therefore, the clutch should be used correctly during use, and maintenance and adjustment should be carried out in time to reduce the incidence of damage to the tractor clutch and prolong the service life.
1. Correct use of clutch
When driving a tractor, when operating the clutch, the disengagement should be quick and complete, and the engagement should be smooth and soft.
When the tractor is working, do not put your foot on the clutch pedal, let alone control the speed of the vehicle with a half-clutch method. Immediately after the clutch is engaged, take your foot off the pedal to avoid the clutch being half-engaged. Use the clutch reasonably, and do not use the method of slamming the clutch to overcome the trapping, overloading and overcoming obstacles. The tractor should not start with a high gear with a load, it should be in a low gear first, and then change into a high gear after starting.
2. Correct adjustment method of clutch
During the use of the clutch, due to the wear and tear of the parts, the clutch will slip or the clutch will not be completely separated. Therefore, it should be adjusted in time. In order to make the clutch work normally, it is necessary to ensure that there is a clearance of 2-3 mm between the release bearing and the inner end faces of the three release levers. When the clutch pedal is depressed until the clearance is eliminated, the travel required by the lower end of the release rocker arm along the axis of the limit bolt is called “free travel”.
After that, continue to step on the clutch pedal, so that the lower end of the release rocker arm continues to move forward along the axis of the limit bolt, and the clutch is completely separated. This distance is called “working stroke”.
During use, due to the wear of the friction plate, the pressure plate moves forward, which will gradually reduce the free stroke. Therefore, the free stroke must be checked and adjusted regularly. When the clutch is not completely disengaged, the working stroke should be adjusted. The adjustment method is: loosen the locking nut of the limit bolt, reduce the exposed length of the limit bolt, and make the working stroke reach the specified value.
If it does not work, the height of the release lever must be adjusted, and then the free stroke and working stroke must be adjusted. After replacing the friction plate with a new one, ensure that the distance between the inner end face of the release lever and the end face of the flywheel when the clutch is in the engaged state meets the regulations.
(1) Adjustment of single-acting clutch clearance
First, adjust the gap between the release lever and the release bearing by changing the length of the clutch lever, and then adjust the 3 release levers by twisting the release lever adjustment nut to make it consistent with the release bearing gap (the ends of the 3 release levers should be in the same plane).
(2) Adjustment of clutch clearance with small brake
First adjust the small brake clearance to the standard value, and then adjust the clutch clearance. The adjustment sequence cannot be reversed. The clutch should be engaged when adjusting the small brake clearance. At this time, the gap between the brake disc friction plate and the brake pressure plate should be 7~8.mm. When the clutch is disengaged, the gap between the small brake spring earring and the pressure plate should be 3~5mm. When the above gap does not meet the requirements, the specified gap value can be obtained by changing the length of the tie rod.
If the gap between the brake friction plate and the brake pressure plate is less than 7-8 mm when the clutch is engaged, and when the clutch is disengaged, the gap between the small brake spring earring and the pressure plate is greater than 3-5 mm, The connecting pin on the pull rod should be removed, the lock nut should be loosened, the pull rod fork should be withdrawn, and the pull rod should be extended until the above two gaps reach the standard value. On the contrary, if the former gap is too large and the latter gap is too small, adjust in the opposite direction.
After the small brake clearance is adjusted, adjust the clearance between the clutch release lever release bearings. The normal state of the clutch should be: when the clutch is in the engaged state, the gap between the end of the release lever and the end face of the release bearing is 3~4mm, the corresponding free stroke of the pedal is 30~40mm, and the ends of the 3 release levers should be On the same plane, the deviation should not be greater than 0.2 mm. If it does not meet the specified value, it should be adjusted. The method is: first remove the cotter pin of the adjusting nut, screw in or loosen the adjusting nut until the clearance is standard. After adjustment, when the full stroke of the clutch pedal is 150~160 mm, the clutch should be completely disengaged, and at the same time it should meet the braking time requirements, otherwise it should be re-checked and adjusted to the standard state.
(3) Double-acting clutch clearance adjustment
In addition to adjusting the clearance between the release lever and the release bearing according to the adjustment method of the single-action clutch, the clearance of the auxiliary clutch should be adjusted, that is, the clearance between the three support bolts and the stop pin. This clearance is adjusted by special screws, screwed in or loosened Remove the screw.
3. Maintenance of clutch
Every 10~20 hours of operation of the tractor, it is necessary to add butter to the front bearing and release bearing of the clutch (some are immersed in oil during disassembly and assembly). When adding butter, do not add too much. Generally, use a grease gun for 3 to 5 times. The amount of oil should be moderate, so as to prevent too much oil from entering the friction plate and causing the clutch to slip.
Due to the small clearance of the clutch, muddy water is easy to splash into the clutch during the working process, and the clutch should be cleaned frequently.
Once oil is found on the friction plate, it should be cleaned in time. When the clutch slips due to oil on the friction plate during operation, it should be cleaned. The method is as follows: add kerosene into the clutch housing (submerging 1/3 of the flywheel is appropriate), start the engine, and run it for 2-3 minutes with the clutch engaged to clean the oil on the surface of each part of the clutch, and release the cleaning oil after the engine is turned off. .
When the clutch is disengaged, it can be cleaned again to remove the oil stains on the contact end faces of the main and auxiliary driven parts. According to the requirements of the technical maintenance regulations, regularly check and adjust the clutch clearance. Once the clutch slips, incomplete separation and other faults are found, they should be eliminated in time, and “sick” operations are not allowed.

